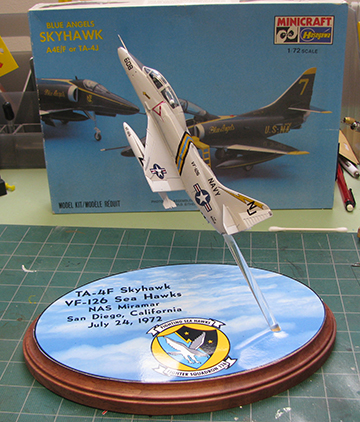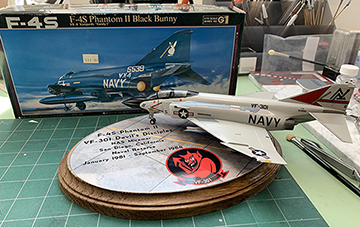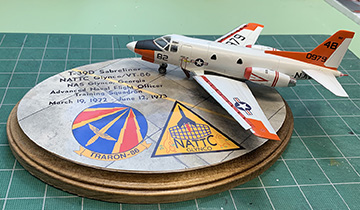
A common dilemma for plastic kit modelers is finding decal markings for a particular aircraft. A modeler sees a photograph of a striking scheme or they have a personal attachment that scheme and want to make a model of it. Several paths are possible. You can luck out and find a kit in the right scale with markings included or you can find an aftermarket decal with those markings. More often than not those aftermarket decals were a limited run and are not longer available, even on eBay. That brings us to a third option — do it yourself.
Decal making is a multi-part process and this is a brief overview on how to get it from concept to finished model. There are many ways to produce markings suitable for plastic kits.
Paint masks
Dry transfer (rub-on)
Water-slide decals
All have their pluses and minuses
Masks — Looks great, but masks are difficult to make and apply to a model. They also may be hard to remove after the paint is dry as sometime the paint peels off when removing the masks. Cutting the masks/stencils is also problematic, ether by hand or with a stencil cutter (Cricut, Brother, or Silhouette).
Dry transfer — Very finicky production process, plus only one color at a time. Initial placement on model can be difficult.
Decal paper — Probably the most used, but does have drawbacks. Commercial decals are printed using a slikscreen process with opaque inks and are printed onto a layer of film already made with the shape of the decal under where the ink is applied. When a commercial decal is placed in water the graphic element that is the decal floats free of the paper — no cutting out of the shape is necessary. Home made decals are a different story. After creating the graphics on a computer, it is then printed out on decal paper using an inkjet or laser printer. There are two kinds of papers available over the counter — clear background and white background. Each has its uses and drawbacks. With hobbyist decal papers, after the decal graphic is printed onto the paper, one has to seal it with a clear overcoat (Krylon or similar) and then cut out around the shape before applying it to the model. One huge downside of using inkjets or laser printers is that neither prints in white ink (a “ghost toner” cartridge — white toner — is available for some laser printers, but that’s a whole ‘nother ballgame with its own limitations). Some hobbyists use the long-discontinued Alps printers, which do have a white color capability, but getting them to print on modern (after 2010) computer systems is, again, a whole ‘nother ballgame. Also, inkjet and laser printers’ final product on the decal paper is thin and sometimes putting a light-colored decal on a dark-painted model results in a color shift of the decal, if it can be seen at all. There are ways around this, such as painting the area under the decal white or printing on white background paper, but trimming the decals can sometimes be difficult or impossible.
Methods of getting the computer graphics to a print-ready state are varied. I personally use Adobe Photoshop and Adobe Illustrator in concert to make the final decal design. There are many techniques to get to the final design and the choice of which tools to use and how to use them is best left to the individual. If there’s enough interest, I could delve into the ways I have done things, but that’s out of the scope of a general overview.
After the decal paper is printed and clear-sealed, it’s time to apply it to the model. First, the different elements of the sheet must be cut out and separated. Using an X-Acto knife or surgical scissors is the best way. Each individual decal is then soaked in warm water until it is ready to separate from the backing paper. The area where the decals will be applied are liberally coated with Micro-Set decal setting solution and the decal slid off the backing paper and put into place. Using a brush or Q-Tip or a paper towel, put the decal into place and let dry. After it’s dry, a coating of Micro-Sol helps firmly seat the decal to the area and force it to snuggle down into any panel lines or other surface features.
After the decals are throughly dry, if desired, the model can be given an overall coat of clear gloss or clear matt finish to give it a uniform look without decal edge lines.
Equipment used to produce custom decals:
Hardware
Mac computer (Originally a 2015 MacBook Pro, now an 2021 iMac M1).
Epson’s SureColor P900 inkjet printer
HP Color Laserjet Pro M254dw laser printer
When white decals are printed I replace the black toner cartridge with a White Ghost Toner laser ink cartridge
Software
Adobe Photoshop
Adobe Illustrator
Decal paper (Micro-Mark — https://www.micromark.com/Micromake-Complete-Inkjet-Decal-Making-Set )
Krylon clear fixative
Questions on work flow and other hints and tricks, contact me: f14ro@aol.com